A Simple Guide to Installing an RV Hatchlift Kit

Installing an RV Hatchlift Kit can make an exterior storage door easier to open and keep open. The kit uses a gas spring to provide lifting support for a compatible RV compartment door. Before starting, make sure you have the correct kit size for your door. The product is designed for lightweight exterior compartment doors on motorhomes, fifth wheels, and travel trailers. Check the door height, width, weight, and construction before installation.
What You Need Before Installation
Before you begin, gather the tools needed for the job. The installation guide recommends a variable speed drill with a #2 Phillips tip, measuring tape, 9/16-inch and 1/2-inch wrench and socket, a #2 Phillips screwdriver, pencil, and safety gloves. Rubber gloves may also be useful. In some installations, you may also need a right-angle drill or a 1/8-inch drill bit. Having the tools ready before you start can make the installation easier.
It is also important to choose the right time for installation. The official instructions recommend installing the kit when the temperature is above 50 degrees F. If possible, have another person help you during the installation. A helper can hold the door while you check the bracket locations and make adjustments. Before attaching anything, open and close the RV door and look at the available space. Make sure the mounting parts will not interfere with normal door movement.
Check the Mounting Location
Start by checking where the mounting plate and brackets will sit on the door. The mounting plate can be moved closer or farther from the top and edge of the door to allow the correct door swing. If you change the plate location, check the door operation before completing the installation. This is an important step because the brackets need to allow the door to open and close properly.
If you are installing Hatchlift Kits on both sides of the same door, keep the upper and lower brackets in approximately the same location on both sides. This helps keep the setup balanced. The gas spring can be installed on either side of the curved bracket by repositioning the ball stud. Take your time during this part and make sure the planned position works before tightening the hardware.
Install the Mounting Plate
Once you have selected the correct location, install the mounting plate according to the instructions supplied with the kit. Use the drill and hardware carefully. The installation instructions specifically say that self-tapping screws can strip if they are tightened too much. When attaching the mounting plate, hand tighten the screws. Do not force the screws or over-tighten them.
After the mounting plate and other brackets are positioned correctly, connect the gas spring. The cylinder end of the spring should be installed on the curved bracket and should point down when the door is open. Check each connection carefully. Make sure the spring is properly attached before testing the door. If anything looks misaligned, stop and correct the position before continuing.
Test the RV Door
After the parts are installed, slowly open and close the RV compartment door. Watch the gas spring and brackets as the door moves. Make sure the spring does not hit another part of the RV and that the door can move through its normal range. The door should open smoothly and the gas spring should provide lifting assistance. If the door does not move correctly, check the mounting locations and bracket positions before using the system.
Once everything looks correct, disconnect the springs after installation. The official instructions recommend allowing 48 hours for the mounting plate to finish adhering to the door. During this time, avoid putting unnecessary stress on the mounting plate. When the 48-hour period is complete, reconnect the springs and check the door again before regular use.
Read the Full Installation Guide
The steps above give you a simple overview of the installation process. For the complete instructions, measurements, safety information, and installation details, use the official guide from Hatchlift.
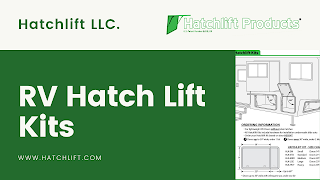
See the RV Hatchlift Kit Installation Guide for detailed installation steps.
Watch the Installation Video
A video can be helpful when installing the kit because you can see where the mounting plate, brackets, and gas spring are positioned. Hatchlift also has an installation video that shows the basic installation process. You can add the video directly below this section so readers can watch it before starting their installation.
YouTube video:
Take your time when installing the kit and check the door movement before regular use. A careful installation helps make sure the gas spring and mounting parts work correctly with the RV compartment door.


Comments
Post a Comment